UPDATE 2016/11: Pressmatic was bought by Flywheel and is now here.
I recently started using Pressmatic for my local WordPress development environment. I was previously using MAMP (not MAMP Pro) and manually creating sites, editing the hosts file, adding vhosts to the MAMP config files, etc. Here’s the method I’m using to convert a site over.
- Note the old MAMP site’s local domain and path.
- Export the old site’s DB out of MySQL (I use phpmyadmin).
- Fire up Pressmatic and click “+ Add Site”.
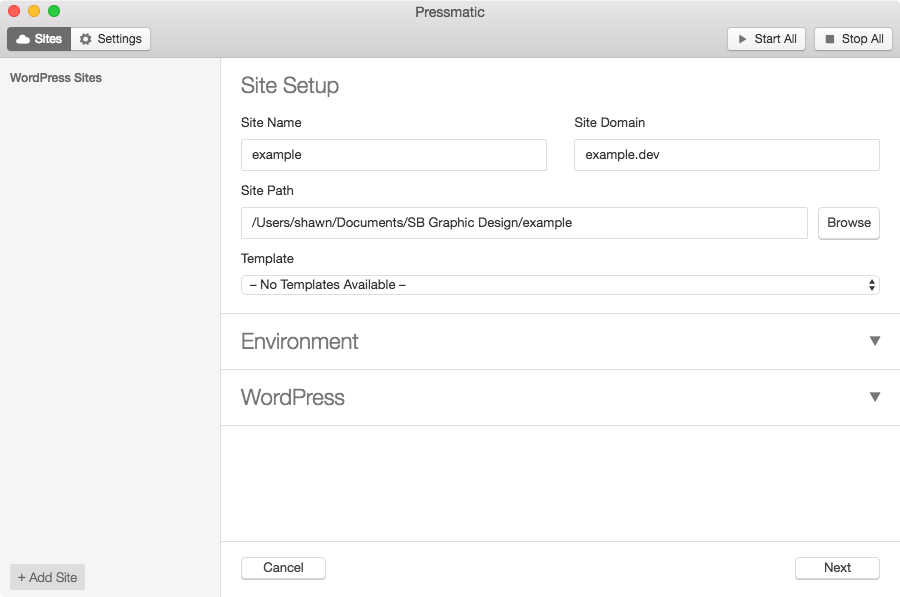
Pressmatic site setup step 1. Name it whatever you want, but for “Site Domain” use the local domain name from step 1. Select the site path. As far as I can tell, you can’t change this easily after the site is set up, so don’t forget this step.
- Under “Environment”, select the PHP version and server type to match the live site’s environment.
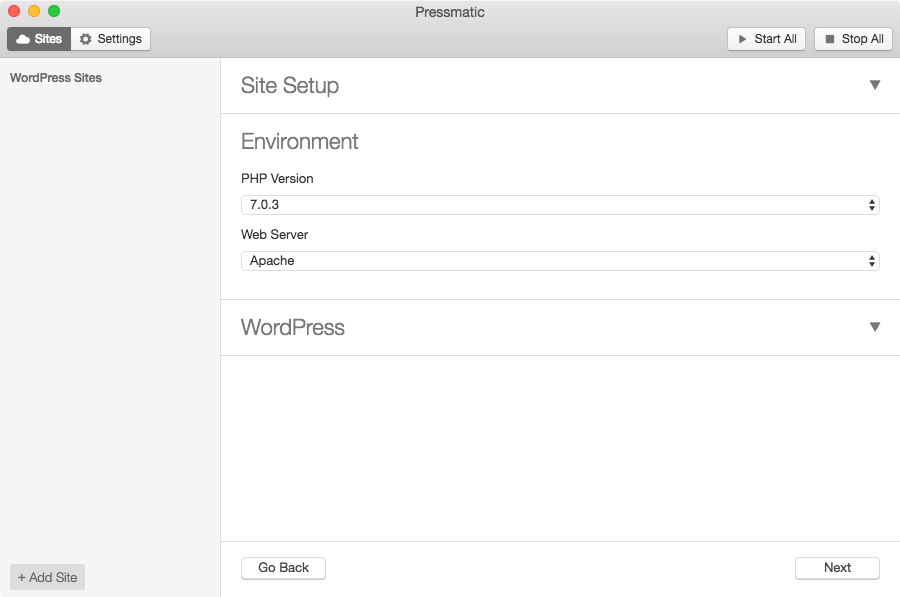
Pressmatic site setup step 2. - For the WordPress settings, just leave them as the defaults, we’re going to be loading in the old environment’s settings anyway.
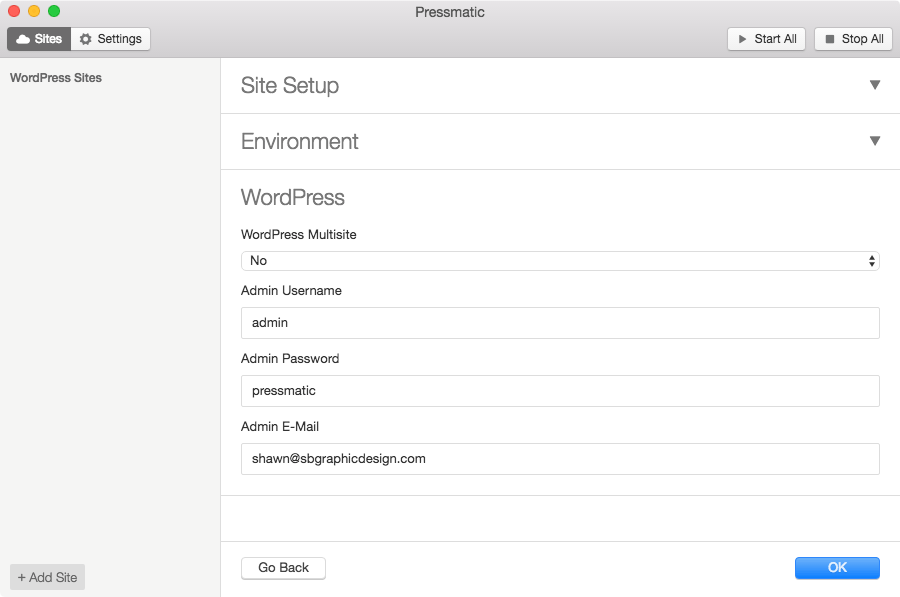
Pressmatic site setup step 3. - Once Pressmatic has created the new site, go to the “Database” tab and open the new DB in either Sequel Pro or Adminer (which is built-in to the new Pressmatic site). There you will delete all the new tables just created and import the old DB from way back in step 2. Remember good ol’ step 2? It was so long ago, but it seems like yesterday…
- At this point I stop the site in Pressmatic while I’m moving/deleting things in the Finder. Not sure if it’s necessary but it makes me feel safer.
- Pressmatic creates the new site in the path /app/public/. As long as your previous site wasn’t at this location, you can remove all the files at this new Pressmatic location. Then move all your old site files to the new “/app/public/” location. Don’t forget hidden files like the “.htaccess” file.
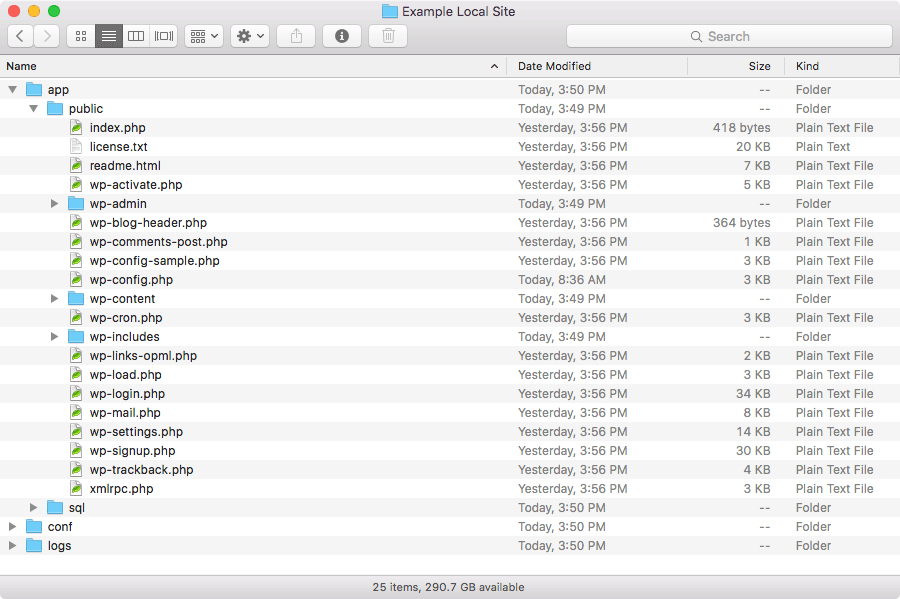
Pressmatic default file structure. - Now we’ll edit the “wp-config.php” file from your old site (which is now located at
/app/public/). The only thing you should need to change is theDB_NAMEconstant, which will now be “pressmatic”. - The only addition I make is to add the snippet of code that is unique to Pressmatic for https support:
/* Inserted by Pressmatic. See: http://codex.wordpress.org/Administration_Over_SSL#Using_a_Reverse_Proxy */ if (isset($_SERVER['HTTP_X_FORWARDED_PROTO']) && $_SERVER['HTTP_X_FORWARDED_PROTO'] === 'https') { $_SERVER['HTTPS'] = 'on'; } - Save the file and start up the new site in Pressmatic.
- At this point I like to use WP Migrate DB Pro to pull down the live database to sync and update file paths, which are now different. WP Migrate DB Pro can do this automatically, which saves a lot of tedious work.
Pressmatic isn’t cheap ($129 lifetime license) but I like the clean, macOS-integrated interface, and the fact that you can change some configuration settings on the fly, dead-simple SSL installation, and easy setup. As you can see from the step above, migrating existing local sites over isn’t trivial, but once you’ve done one the rest are much easier.
Pressmatic works by running a headless virtual machine using VirtualBox, so the overhead isn’t small (1 GB of RAM). Probably not a dealbreaker for most people, though.
Comment